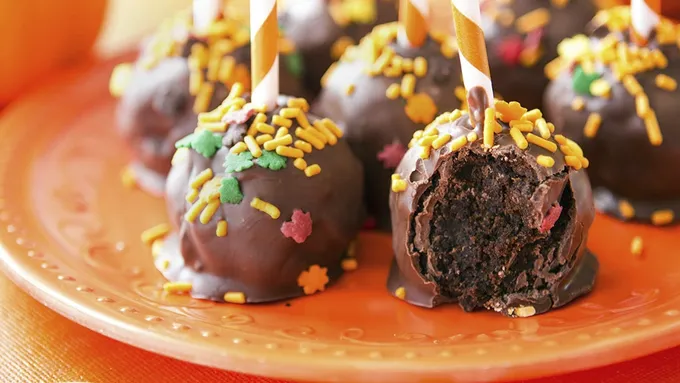
Fancy yet simple, these one-bite treats are the perfect way to meet a chocolate craving in style.
More About This Recipe
- Cake pops have been all the rage ever since they burst onto the scene a few years back. Pay a pretty penny for them or -- better yet -- make them yourself! Pretty mounds of cake and frosting on a stick? What’s not to love?! Well, for one thing … cake pops can be a rather finicky recipe. They can be gloppy. They can be bloppy. They can plop into your bowl of melted chocolate and be ruined forever. To keep you from making any of these rookie mistakes, here’s how to pull together a fancy batch of chocolate cake pops in no time at all. Store your cake pops in the fridge for up to three days. Serve to kids of all ages, and enjoy entirely! YUM!
Chocolate Truffle Cake Pops
- Prep Time 15 min
- Total 30 min
- Servings 16
- Ingredients 4
Ingredients
- 1 box Betty Crocker™ Delights Super Moist™ Triple Chocolate Fudge Cake Mix
- 1 tub (16 oz) Betty Crocker™ Rich & Creamy Chocolate Frosting
- 2 cups milk chocolate chips
- 2 tablespoons chocolate sprinkles
Instructions
-
Step1Once your cake is cooked and cooled, crumble half of it into a large bowl (cover, wrap, and freeze the other half for later. A full cake makes a LOT of cake pops.)
-
Step2Add 1/4 cup of frosting to the cake mixture. Use a fork to work the frosting through. Continue adding frosting by the tablespoonful, JUST until the cake mixture starts to stick together. It shouldn’t feel wet at all, but should adhere to itself in a playdoh-like texture.
![]()
-
Step3Roll tablespoon-fulls of cake into cake balls.
![]()
-
Step4In a small, deep, microwave-safe bowl, heat the chocolate chips JUST until they are melted (usually about 90 seconds or so). Stir until smooth.
-
Step5Press the end of a sucker stick into the melted chocolate, then press that end into the center of your cake ball. Take a small spoonful of melted chocolate and carefully smooth it around the bottom part of the stick and cake ball. Allow the chocolate to harden completely.
![]()
-
Step6Gently dip the cake ball into the melted chocolate. Allow any excess chocolate to drizzle back into the bowl before pressing the top of the cake pop into crushed peanuts or chocolate sprinkles.
-
Step7Turn the cake pop right side up and press the bottom of the sucker stick into a piece of styrofoam.
![]()
-
Step8Allow the cake pops to cool upright until ready to serve. Once chocolate is hardened, serve the cake pops, or cover them and store them in the fridge for up to three days. Enjoy!
![]()
Nutrition
No nutrition information available for this recipe
(function() {
document.addEventListener('DOMContentLoaded', function() {
var componentMetadata = JSON.parse('\x7b\x22componentName\x22\x3a\x22RelatedContent_86838426-dd26-481a-9735-69435bca607d\x22,\x22deferOptions\x22\x3a\x7b\x22deferComponent\x22\x3afalse,\x22deferType\x22\x3a\x22None\x22,\x22deferId\x22\x3a\x22rad1274ae6d5640e48d5c062685468528\x22,\x22deferredContainerId\x22\x3a\x22\x2fmain\x2frdpRelatedContent1_NonDeferred\x22,\x22deferredContainerView\x22\x3anull\x7d,\x22viewName\x22\x3a\x22RelatedContent\x22\x7d');
var configuration = {"dataSourceId":"86838426-dd26-481a-9735-69435bca607d","isCurrentUserAnonymous":true,"isAnonymousUserWithFavorites":false,"relatedContentList":{"contentId":"d73cf462-6bb2-4512-a7d9-944da220a98d","listSettings":{"pageSize":3,"startPage":1,"listType":1,"title":"Try These Next","useModalRegistration":false,"regAction":"","esrcCode":0,"favoriteButtonLabelFormat":"Add {0} to favorites","contentTypes":["Category"],"showImages":false,"imageSize":0,"showRatings":false,"allowFavoriting":false,"cssClassName":"relatedContentWithoutImages","favoriteButtonText":""},"items":[{"contentId":"afc970f5-8b27-44b0-91cd-c8845febfd72","contentType":"Category","title":"Rainbow Cake","isFavorite":false,"linkUrl":"/courses/dessert/cake/rainbow-cake","numberOfRatings":"0","averageRating":"0","averageRatingStars":"0","smallImageUrl":"","mediumImageUrl":""},{"contentId":"149d38aa-1950-42dc-a4aa-d1674dee3175","contentType":"Category","title":"Vanilla Cake","isFavorite":false,"linkUrl":"/courses/dessert/cake/vanilla-cake","numberOfRatings":"0","averageRating":"0","averageRatingStars":"0","smallImageUrl":"","mediumImageUrl":""},{"contentId":"ad554bb9-2372-4217-87cf-e052fc81d644","contentType":"Category","title":"Yellow Cake","isFavorite":false,"linkUrl":"/courses/dessert/cake/yellow-cake","numberOfRatings":"0","averageRating":"0","averageRatingStars":"0","smallImageUrl":"","mediumImageUrl":""}],"availableItems":[{"contentId":"afc970f5-8b27-44b0-91cd-c8845febfd72","contentType":"Category","title":"Rainbow Cake","isFavorite":false,"linkUrl":"/courses/dessert/cake/rainbow-cake","numberOfRatings":"0","averageRating":"0","averageRatingStars":"0","smallImageUrl":"","mediumImageUrl":""},{"contentId":"149d38aa-1950-42dc-a4aa-d1674dee3175","contentType":"Category","title":"Vanilla Cake","isFavorite":false,"linkUrl":"/courses/dessert/cake/vanilla-cake","numberOfRatings":"0","averageRating":"0","averageRatingStars":"0","smallImageUrl":"","mediumImageUrl":""},{"contentId":"ad554bb9-2372-4217-87cf-e052fc81d644","contentType":"Category","title":"Yellow Cake","isFavorite":false,"linkUrl":"/courses/dessert/cake/yellow-cake","numberOfRatings":"0","averageRating":"0","averageRatingStars":"0","smallImageUrl":"","mediumImageUrl":""}]}};
var moduleName = 'relatedContent';
var isVueModule = true;
GeneralMills.PandoSites.RegisterControlInstance(moduleName, configuration, componentMetadata, isVueModule)
});
})();
(function() {
document.addEventListener('DOMContentLoaded', function() {
var componentMetadata = JSON.parse('\x7b\x22componentName\x22\x3a\x22RelatedContent_9930dad2-817c-4363-b508-21f459b3c521\x22,\x22deferOptions\x22\x3a\x7b\x22deferComponent\x22\x3atrue,\x22deferType\x22\x3a\x22OnDemand\x22,\x22deferId\x22\x3a\x22r1da543b4fbbf41b5a01bd65b2c4ed8a3\x22,\x22deferredContainerId\x22\x3a\x22\x2fmain\x2frdpRelatedContent1\x22,\x22deferredContainerView\x22\x3a\x22RecipeDetailRedesign\x22\x7d,\x22viewName\x22\x3a\x22RelatedContent\x22\x7d');
var configuration = {"dataSourceId":"9930dad2-817c-4363-b508-21f459b3c521","isCurrentUserAnonymous":true,"isAnonymousUserWithFavorites":false,"relatedContentList":{"contentId":"d73cf462-6bb2-4512-a7d9-944da220a98d","listSettings":{"pageSize":6,"startPage":1,"listType":1,"title":"","useModalRegistration":false,"regAction":"","esrcCode":0,"favoriteButtonLabelFormat":"Add {0} to favorites","contentTypes":[],"showImages":true,"imageSize":1,"showRatings":false,"allowFavoriting":true,"cssClassName":"","favoriteButtonText":"Save"},"items":[{"contentId":"03ff625a-be8e-4de7-8364-7f9670ec46e2","contentType":"Recipe","title":"Chocolate Covered Pumpkin Cake Pops","isFavorite":false,"linkUrl":"/recipes/chocolate-covered-pumpkin-cake-pops/03ff625a-be8e-4de7-8364-7f9670ec46e2","numberOfRatings":"0","averageRating":"0","averageRatingStars":"0","smallImageUrl":"//mojo.generalmills.com/api/public/content/EDkPQja2QEeF_vzHvhA5lw_webp_base.webp?v=13f4b921\u0026t=67e847e026fb43aa8d6e3f5ef39a4ef7","mediumImageUrl":"//mojo.generalmills.com/api/public/content/EDkPQja2QEeF_vzHvhA5lw_webp_base.webp?v=13f4b921\u0026t=3653fe2f5ecd4a47a5a51c97e429947c"},{"contentId":"51da64cc-1362-4246-b5e8-b9025682ab4a","contentType":"Recipe","title":"Giant Snow Globe Cake","isFavorite":false,"linkUrl":"/recipes/giant-snow-globe-cake/51da64cc-1362-4246-b5e8-b9025682ab4a","numberOfRatings":"0","averageRating":"0","averageRatingStars":"0","smallImageUrl":"//mojo.generalmills.com/api/public/content/Hn8LkF0oeU2BoH99FIJWBw_webp_base.webp?v=90b40ee1\u0026t=67e847e026fb43aa8d6e3f5ef39a4ef7","mediumImageUrl":"//mojo.generalmills.com/api/public/content/Hn8LkF0oeU2BoH99FIJWBw_webp_base.webp?v=90b40ee1\u0026t=3653fe2f5ecd4a47a5a51c97e429947c"},{"contentId":"67c0786a-0738-46af-8f4b-c8a52ad858ea","contentType":"Recipe","title":"Wedding Cake Pops","isFavorite":false,"linkUrl":"/recipes/wedding-cake-pops/67c0786a-0738-46af-8f4b-c8a52ad858ea","numberOfRatings":"0","averageRating":"0","averageRatingStars":"0","smallImageUrl":"//images-gmi-pmc.edge-generalmills.com/c05c02a1-02c9-4106-9305-00e121dd1139.jpg","mediumImageUrl":"//images-gmi-pmc.edge-generalmills.com/ee9205f5-0ed6-4fb8-aebe-ba06a64c5116.jpg"},{"contentId":"28afd767-d85a-4075-8df5-d45873dd70f7","contentType":"Recipe","title":"Peanut Butter Cake Ball Buckeyes","isFavorite":false,"linkUrl":"/recipes/peanut-butter-cake-ball-buckeyes/28afd767-d85a-4075-8df5-d45873dd70f7","numberOfRatings":"0","averageRating":"0","averageRatingStars":"0","smallImageUrl":"//mojo.generalmills.com/api/public/content/vFfy5t_SUUeSR_uyU9gXJw_webp_base.webp?v=6ccd58f0\u0026t=67e847e026fb43aa8d6e3f5ef39a4ef7","mediumImageUrl":"//mojo.generalmills.com/api/public/content/vFfy5t_SUUeSR_uyU9gXJw_webp_base.webp?v=6ccd58f0\u0026t=3653fe2f5ecd4a47a5a51c97e429947c"},{"contentId":"3d4d01f7-72cc-434a-ac13-f2f19c3379aa","contentType":"Recipe","title":"Cookie Stuffed Brownie Cupcakes","isFavorite":false,"linkUrl":"/recipes/cookie-stuffed-brownie-cupcakes/3d4d01f7-72cc-434a-ac13-f2f19c3379aa","numberOfRatings":"0","averageRating":"0","averageRatingStars":"0","smallImageUrl":"//mojo.generalmills.com/api/public/content/bUeMBFt-2Ey519eG0D5inQ_webp_base.webp?v=76a7e571\u0026t=67e847e026fb43aa8d6e3f5ef39a4ef7","mediumImageUrl":"//mojo.generalmills.com/api/public/content/bUeMBFt-2Ey519eG0D5inQ_webp_base.webp?v=76a7e571\u0026t=3653fe2f5ecd4a47a5a51c97e429947c"},{"contentId":"0e845fcb-bcca-4c75-84cc-ad06385d37b8","contentType":"Recipe","title":"Cookie Cake Pie","isFavorite":false,"linkUrl":"/recipes/cookie-cake-pie/0e845fcb-bcca-4c75-84cc-ad06385d37b8","numberOfRatings":"0","averageRating":"0","averageRatingStars":"0","smallImageUrl":"//mojo.generalmills.com/api/public/content/eO_mXvvw2kSvsTaRF6MKow_webp_base.webp?v=50a7455a\u0026t=67e847e026fb43aa8d6e3f5ef39a4ef7","mediumImageUrl":"//mojo.generalmills.com/api/public/content/eO_mXvvw2kSvsTaRF6MKow_webp_base.webp?v=50a7455a\u0026t=3653fe2f5ecd4a47a5a51c97e429947c"}],"availableItems":[{"contentId":"03ff625a-be8e-4de7-8364-7f9670ec46e2","contentType":"Recipe","title":"Chocolate Covered Pumpkin Cake Pops","isFavorite":false,"linkUrl":"/recipes/chocolate-covered-pumpkin-cake-pops/03ff625a-be8e-4de7-8364-7f9670ec46e2","numberOfRatings":"0","averageRating":"0","averageRatingStars":"0","smallImageUrl":"//mojo.generalmills.com/api/public/content/EDkPQja2QEeF_vzHvhA5lw_webp_base.webp?v=13f4b921\u0026t=67e847e026fb43aa8d6e3f5ef39a4ef7","mediumImageUrl":"//mojo.generalmills.com/api/public/content/EDkPQja2QEeF_vzHvhA5lw_webp_base.webp?v=13f4b921\u0026t=3653fe2f5ecd4a47a5a51c97e429947c"},{"contentId":"51da64cc-1362-4246-b5e8-b9025682ab4a","contentType":"Recipe","title":"Giant Snow Globe Cake","isFavorite":false,"linkUrl":"/recipes/giant-snow-globe-cake/51da64cc-1362-4246-b5e8-b9025682ab4a","numberOfRatings":"0","averageRating":"0","averageRatingStars":"0","smallImageUrl":"//mojo.generalmills.com/api/public/content/Hn8LkF0oeU2BoH99FIJWBw_webp_base.webp?v=90b40ee1\u0026t=67e847e026fb43aa8d6e3f5ef39a4ef7","mediumImageUrl":"//mojo.generalmills.com/api/public/content/Hn8LkF0oeU2BoH99FIJWBw_webp_base.webp?v=90b40ee1\u0026t=3653fe2f5ecd4a47a5a51c97e429947c"},{"contentId":"67c0786a-0738-46af-8f4b-c8a52ad858ea","contentType":"Recipe","title":"Wedding Cake Pops","isFavorite":false,"linkUrl":"/recipes/wedding-cake-pops/67c0786a-0738-46af-8f4b-c8a52ad858ea","numberOfRatings":"0","averageRating":"0","averageRatingStars":"0","smallImageUrl":"//images-gmi-pmc.edge-generalmills.com/c05c02a1-02c9-4106-9305-00e121dd1139.jpg","mediumImageUrl":"//images-gmi-pmc.edge-generalmills.com/ee9205f5-0ed6-4fb8-aebe-ba06a64c5116.jpg"},{"contentId":"28afd767-d85a-4075-8df5-d45873dd70f7","contentType":"Recipe","title":"Peanut Butter Cake Ball Buckeyes","isFavorite":false,"linkUrl":"/recipes/peanut-butter-cake-ball-buckeyes/28afd767-d85a-4075-8df5-d45873dd70f7","numberOfRatings":"0","averageRating":"0","averageRatingStars":"0","smallImageUrl":"//mojo.generalmills.com/api/public/content/vFfy5t_SUUeSR_uyU9gXJw_webp_base.webp?v=6ccd58f0\u0026t=67e847e026fb43aa8d6e3f5ef39a4ef7","mediumImageUrl":"//mojo.generalmills.com/api/public/content/vFfy5t_SUUeSR_uyU9gXJw_webp_base.webp?v=6ccd58f0\u0026t=3653fe2f5ecd4a47a5a51c97e429947c"},{"contentId":"3d4d01f7-72cc-434a-ac13-f2f19c3379aa","contentType":"Recipe","title":"Cookie Stuffed Brownie Cupcakes","isFavorite":false,"linkUrl":"/recipes/cookie-stuffed-brownie-cupcakes/3d4d01f7-72cc-434a-ac13-f2f19c3379aa","numberOfRatings":"0","averageRating":"0","averageRatingStars":"0","smallImageUrl":"//mojo.generalmills.com/api/public/content/bUeMBFt-2Ey519eG0D5inQ_webp_base.webp?v=76a7e571\u0026t=67e847e026fb43aa8d6e3f5ef39a4ef7","mediumImageUrl":"//mojo.generalmills.com/api/public/content/bUeMBFt-2Ey519eG0D5inQ_webp_base.webp?v=76a7e571\u0026t=3653fe2f5ecd4a47a5a51c97e429947c"},{"contentId":"0e845fcb-bcca-4c75-84cc-ad06385d37b8","contentType":"Recipe","title":"Cookie Cake Pie","isFavorite":false,"linkUrl":"/recipes/cookie-cake-pie/0e845fcb-bcca-4c75-84cc-ad06385d37b8","numberOfRatings":"0","averageRating":"0","averageRatingStars":"0","smallImageUrl":"//mojo.generalmills.com/api/public/content/eO_mXvvw2kSvsTaRF6MKow_webp_base.webp?v=50a7455a\u0026t=67e847e026fb43aa8d6e3f5ef39a4ef7","mediumImageUrl":"//mojo.generalmills.com/api/public/content/eO_mXvvw2kSvsTaRF6MKow_webp_base.webp?v=50a7455a\u0026t=3653fe2f5ecd4a47a5a51c97e429947c"}]}};
var moduleName = 'relatedContent';
var isVueModule = true;
GeneralMills.PandoSites.RegisterControlInstance(moduleName, configuration, componentMetadata, isVueModule)
});
})();
© 2025 ®/TM General Mills All Rights Reserved


