Top the rim of your beer mug with cheese filled pretzels shaped and decorated to look like footballs.
More About This Recipe
-
I'm not a big football fan, but even I enjoy going to the big game day parties.
There's always good food and great company. While everyone is watching the game, I'm usually in the kitchen, prepping food or just hanging out chatting with my friends. This year I hope to wow party guests by making these Beer Mug Cheese Stuffed Football Pretzels to hang on the rims of beer mugs. I'm sure they'll be a huge hit!
Even though I may not spend much time watching the game, I don't want to spend all night working either, so I took a shortcut and made these pretzels out of Pillsbury Thin Crust Pizza Dough. The pizza dough works great. It bakes up really dark brown to give the football shaped pretzels a very natural looking color – and with the addition of some cream cheese laces, these appetizers look like the real deal.
Cut a block of cheese into 1/2 inch thick slices. Cut out 12 small oval-shaped pieces. Freeze for at least an hour. Go watch the game for a while.
Unroll the Pillsbury Pizza Dough and cut into 12 rectangles.
Set a frozen oval-shaped piece of cheese on a piece of dough. Roll up and shape into a football. Freeze just until needed.
Bring water and baking soda to a boil, then reduce to a simmer.
Drop one or two footballs into water and boil for about 20 seconds. Flip over after 10 seconds.
Remove and allow excess water to drip off.
Sprinkle some salt on the backside of each pretzel. If you put the salt on the top, you'll have speckles on your footballs – and that just doesn't look right.
Set the footballs seam side down on a non-stick foil lined baking sheet (or use a non-stick baking pan.) Reshape if needed.
Put in the oven and set the timer. Be sure to watch them near the end of the baking time!
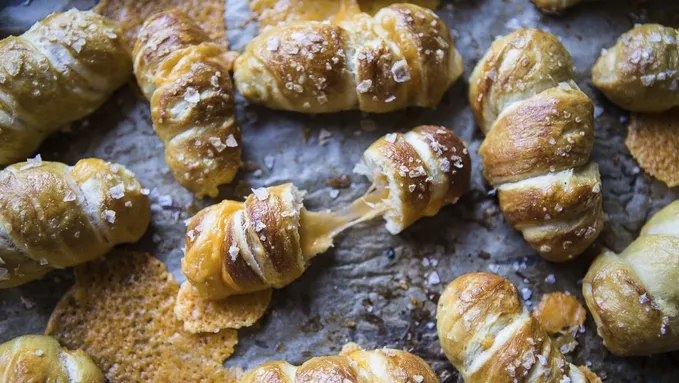
The pretzels will brown very nicely and some cheese may ooze out. Just cut it off and enjoy a little snack.
Allow the pretzels to cool for 10 minutes. Cut a slit in the tip of each pretzel if you plan to hang them on your beer mugs.
Fill a small zip top bag with cream cheese, snip off the tip, and pipe on the stripes and laces.
Now go wow your game day party guests with your crafty food!
Looking for more game day treats to serve your guests? Check out these 15 Game Day Apps that Won’t Embarrass You!
Beer Mug Cheese Stuffed Football Pretzels
- Prep Time 40 min
- Total 1 hr 50 min
- Servings 12
- Ingredients 6
Ingredients
- 4 ounce block of cheddar cheese
- 1 can (11 oz) refrigerated Pillsbury™ Thin Crust Pizza Crust
- 5 cups water
- 1/3 cup baking soda
- Pretzel salt
- 2 ounces cream cheese, softened
Instructions
-
Step1Cut a block of cheese into 1/2 inch thick slices. Cut out 12 small oval shaped pieces. Freeze for at least an hour.
-
Step2Preheat oven to 450°F.
-
Step3Unroll Pillsbury™ refrigerated thin pizza crust and cut into 12 rectangles.
-
Step4Set a frozen oval shaped cheese on dough. Roll up and shape into a football. Freeze just until needed.
-
Step5Bring water and baking soda to a boil then reduce to a simmer.
-
Step6Drop one or two footballs into water and boil for about 20 seconds. Flip over after 10 seconds.
-
Step7Remove and allow excess water to drip off.
-
Step8Sprinkle some salt on the backside of each pretzel.
-
Step9Set the footballs, seam side down on a non-stick foil lined baking sheet (or use a non-stick baking pan.) Reshape if needed.
-
Step10Bake for 9-11 minutes until golden brown.
-
Step11Fill a small zip top bag with cream cheese, snip off the tip, and pipe on the stripes and laces.
Nutrition
No nutrition information available for this recipe
(function() {
document.addEventListener('DOMContentLoaded', function() {
var componentMetadata = JSON.parse('\x7b\x22componentName\x22\x3a\x22RelatedContent_86838426-dd26-481a-9735-69435bca607d\x22,\x22deferOptions\x22\x3a\x7b\x22deferComponent\x22\x3afalse,\x22deferType\x22\x3a\x22None\x22,\x22deferId\x22\x3a\x22r8dbc71e292aa45f5a6c3d5cca254447f\x22,\x22deferredContainerId\x22\x3a\x22\x2fmain\x2frdpRelatedContent1_NonDeferred\x22,\x22deferredContainerView\x22\x3anull\x7d,\x22viewName\x22\x3a\x22RelatedContent\x22\x7d');
var configuration = {"dataSourceId":"86838426-dd26-481a-9735-69435bca607d","isCurrentUserAnonymous":true,"isAnonymousUserWithFavorites":false,"relatedContentList":{"contentId":"fc6bfe36-e0d5-487a-96dc-fcbd41b1ff83","listSettings":{"pageSize":3,"startPage":1,"listType":1,"title":"Try These Next","useModalRegistration":false,"regAction":"","esrcCode":0,"favoriteButtonLabelFormat":"Add {0} to favorites","contentTypes":["Category"],"showImages":false,"imageSize":0,"showRatings":false,"allowFavoriting":false,"cssClassName":"relatedContentWithoutImages","favoriteButtonText":""},"items":[{"contentId":"5f860398-1289-48c4-b6df-d57ad27cbd44","contentType":"Category","title":"Game Day","isFavorite":false,"linkUrl":"/parties-and-holidays/sports-events","numberOfRatings":"0","averageRating":"0","averageRatingStars":"0","smallImageUrl":"//images-gmi-pmc.edge-generalmills.com/6ad588d6-12ef-46d2-9a30-a41057b94551.jpg","mediumImageUrl":"//images-gmi-pmc.edge-generalmills.com/0a99c7d7-a4bf-4397-be9f-2241cb1b03bd.jpg"},{"contentId":"f089141c-c86e-495d-9d41-9d61214b2973","contentType":"Category","title":"Football Appetizers","isFavorite":false,"linkUrl":"/parties-and-holidays/sports-events/football-appetizer","numberOfRatings":"0","averageRating":"0","averageRatingStars":"0","smallImageUrl":"","mediumImageUrl":""},{"contentId":"c9b55ab5-ba6a-48f9-9b6e-c2e9e35b15e0","contentType":"Category","title":"Hot Appetizers","isFavorite":false,"linkUrl":"/courses/appetizer/hot-appetizer","numberOfRatings":"0","averageRating":"0","averageRatingStars":"0","smallImageUrl":"","mediumImageUrl":""}],"availableItems":[{"contentId":"5f860398-1289-48c4-b6df-d57ad27cbd44","contentType":"Category","title":"Game Day","isFavorite":false,"linkUrl":"/parties-and-holidays/sports-events","numberOfRatings":"0","averageRating":"0","averageRatingStars":"0","smallImageUrl":"//images-gmi-pmc.edge-generalmills.com/6ad588d6-12ef-46d2-9a30-a41057b94551.jpg","mediumImageUrl":"//images-gmi-pmc.edge-generalmills.com/0a99c7d7-a4bf-4397-be9f-2241cb1b03bd.jpg"},{"contentId":"f089141c-c86e-495d-9d41-9d61214b2973","contentType":"Category","title":"Football Appetizers","isFavorite":false,"linkUrl":"/parties-and-holidays/sports-events/football-appetizer","numberOfRatings":"0","averageRating":"0","averageRatingStars":"0","smallImageUrl":"","mediumImageUrl":""},{"contentId":"c9b55ab5-ba6a-48f9-9b6e-c2e9e35b15e0","contentType":"Category","title":"Hot Appetizers","isFavorite":false,"linkUrl":"/courses/appetizer/hot-appetizer","numberOfRatings":"0","averageRating":"0","averageRatingStars":"0","smallImageUrl":"","mediumImageUrl":""}]}};
var moduleName = 'relatedContent';
var isVueModule = true;
GeneralMills.PandoSites.RegisterControlInstance(moduleName, configuration, componentMetadata, isVueModule)
});
})();
(function() {
document.addEventListener('DOMContentLoaded', function() {
var componentMetadata = JSON.parse('\x7b\x22componentName\x22\x3a\x22RelatedContent_9930dad2-817c-4363-b508-21f459b3c521\x22,\x22deferOptions\x22\x3a\x7b\x22deferComponent\x22\x3atrue,\x22deferType\x22\x3a\x22OnDemand\x22,\x22deferId\x22\x3a\x22rc6dac7f14d6048bb8546ff57eea6f95e\x22,\x22deferredContainerId\x22\x3a\x22\x2fmain\x2frdpRelatedContent1\x22,\x22deferredContainerView\x22\x3a\x22RecipeDetailRedesign\x22\x7d,\x22viewName\x22\x3a\x22RelatedContent\x22\x7d');
var configuration = {"dataSourceId":"9930dad2-817c-4363-b508-21f459b3c521","isCurrentUserAnonymous":true,"isAnonymousUserWithFavorites":false,"relatedContentList":{"contentId":"fc6bfe36-e0d5-487a-96dc-fcbd41b1ff83","listSettings":{"pageSize":6,"startPage":1,"listType":1,"title":"","useModalRegistration":false,"regAction":"","esrcCode":0,"favoriteButtonLabelFormat":"Add {0} to favorites","contentTypes":[],"showImages":true,"imageSize":1,"showRatings":false,"allowFavoriting":true,"cssClassName":"","favoriteButtonText":"Save"},"items":[{"contentId":"6a938f2f-c0fd-4574-be2c-57308366d476","contentType":"Recipe","title":"Copycat Auntie Anne\u0027s™ Cheddar Stuffed Pretzel Nuggets","isFavorite":false,"linkUrl":"/recipes/copycat-auntie-annes-cheddar-stuffed-pretzel-nuggets/6a938f2f-c0fd-4574-be2c-57308366d476","numberOfRatings":"0","averageRating":"0","averageRatingStars":"0","smallImageUrl":"//mojo.generalmills.com/api/public/content/Uy7jOm200kGdPjzQtmaMVQ_webp_base.webp?v=b0a58216\u0026t=67e847e026fb43aa8d6e3f5ef39a4ef7","mediumImageUrl":"//mojo.generalmills.com/api/public/content/Uy7jOm200kGdPjzQtmaMVQ_webp_base.webp?v=b0a58216\u0026t=3653fe2f5ecd4a47a5a51c97e429947c"},{"contentId":"d8b726f5-25ba-4c8c-b3ae-f2226967f064","contentType":"Recipe","title":"Easy Beer Cheese Dip","isFavorite":false,"linkUrl":"/recipes/easy-beer-cheese-dip/d8b726f5-25ba-4c8c-b3ae-f2226967f064","numberOfRatings":"0","averageRating":"0","averageRatingStars":"0","smallImageUrl":"//mojo.generalmills.com/api/public/content/XJXWLDuM-EOr6F5YNkYB_Q_webp_base.webp?v=c06de253\u0026t=67e847e026fb43aa8d6e3f5ef39a4ef7","mediumImageUrl":"//mojo.generalmills.com/api/public/content/XJXWLDuM-EOr6F5YNkYB_Q_webp_base.webp?v=c06de253\u0026t=3653fe2f5ecd4a47a5a51c97e429947c"},{"contentId":"40487892-6827-4ddd-88c0-8337e53d1c03","contentType":"Recipe","title":"Beer Cheese Brat Dip with Pretzel Bites","isFavorite":false,"linkUrl":"/recipes/beer-cheese-brat-dip-with-pretzel-bites/40487892-6827-4ddd-88c0-8337e53d1c03","numberOfRatings":"0","averageRating":"0","averageRatingStars":"0","smallImageUrl":"//mojo.generalmills.com/api/public/content/nB3pyqQoOEysUkvB1D8v1Q_webp_base.webp?v=98ed3697\u0026t=67e847e026fb43aa8d6e3f5ef39a4ef7","mediumImageUrl":"//mojo.generalmills.com/api/public/content/nB3pyqQoOEysUkvB1D8v1Q_webp_base.webp?v=98ed3697\u0026t=3653fe2f5ecd4a47a5a51c97e429947c"},{"contentId":"e12197ca-54de-46e1-8282-0d3e82addb5d","contentType":"Recipe","title":"Stuffed Pepperoni Pizza Braid","isFavorite":false,"linkUrl":"/recipes/stuffed-pepperoni-pizza-braid/e12197ca-54de-46e1-8282-0d3e82addb5d","numberOfRatings":"0","averageRating":"0","averageRatingStars":"0","smallImageUrl":"//mojo.generalmills.com/api/public/content/w6Jw3bt35kOrtBQrUXc00A_webp_base.webp?v=00cc7afb\u0026t=67e847e026fb43aa8d6e3f5ef39a4ef7","mediumImageUrl":"//mojo.generalmills.com/api/public/content/w6Jw3bt35kOrtBQrUXc00A_webp_base.webp?v=00cc7afb\u0026t=3653fe2f5ecd4a47a5a51c97e429947c"},{"contentId":"0c1a7849-32f3-4565-8df4-c125a9193805","contentType":"Recipe","title":"Pretzel Puffs","isFavorite":false,"linkUrl":"/recipes/pretzel-puffs/0c1a7849-32f3-4565-8df4-c125a9193805","numberOfRatings":"0","averageRating":"0","averageRatingStars":"0","smallImageUrl":"//mojo.generalmills.com/api/public/content/S4glsvGqRE6nzgTx4jYidg_webp_base.webp?v=0be4b23b\u0026t=67e847e026fb43aa8d6e3f5ef39a4ef7","mediumImageUrl":"//images-gmi-pmc.edge-generalmills.com/ad3349b5-9235-4b5e-b6ed-2671291531fb.jpg"},{"contentId":"6b99d141-0271-43d0-b3e2-54d369dd2a7c","contentType":"Recipe","title":"Mini Snowman Pizzas","isFavorite":false,"linkUrl":"/recipes/mini-snowman-pizzas/6b99d141-0271-43d0-b3e2-54d369dd2a7c","numberOfRatings":"0","averageRating":"0","averageRatingStars":"0","smallImageUrl":"//mojo.generalmills.com/api/public/content/LPWoxuZxhEiecnlDt-jhSQ_webp_base.webp?v=2b1285f2\u0026t=67e847e026fb43aa8d6e3f5ef39a4ef7","mediumImageUrl":"//mojo.generalmills.com/api/public/content/LPWoxuZxhEiecnlDt-jhSQ_webp_base.webp?v=2b1285f2\u0026t=3653fe2f5ecd4a47a5a51c97e429947c"}],"availableItems":[{"contentId":"6a938f2f-c0fd-4574-be2c-57308366d476","contentType":"Recipe","title":"Copycat Auntie Anne\u0027s™ Cheddar Stuffed Pretzel Nuggets","isFavorite":false,"linkUrl":"/recipes/copycat-auntie-annes-cheddar-stuffed-pretzel-nuggets/6a938f2f-c0fd-4574-be2c-57308366d476","numberOfRatings":"0","averageRating":"0","averageRatingStars":"0","smallImageUrl":"//mojo.generalmills.com/api/public/content/Uy7jOm200kGdPjzQtmaMVQ_webp_base.webp?v=b0a58216\u0026t=67e847e026fb43aa8d6e3f5ef39a4ef7","mediumImageUrl":"//mojo.generalmills.com/api/public/content/Uy7jOm200kGdPjzQtmaMVQ_webp_base.webp?v=b0a58216\u0026t=3653fe2f5ecd4a47a5a51c97e429947c"},{"contentId":"d8b726f5-25ba-4c8c-b3ae-f2226967f064","contentType":"Recipe","title":"Easy Beer Cheese Dip","isFavorite":false,"linkUrl":"/recipes/easy-beer-cheese-dip/d8b726f5-25ba-4c8c-b3ae-f2226967f064","numberOfRatings":"0","averageRating":"0","averageRatingStars":"0","smallImageUrl":"//mojo.generalmills.com/api/public/content/XJXWLDuM-EOr6F5YNkYB_Q_webp_base.webp?v=c06de253\u0026t=67e847e026fb43aa8d6e3f5ef39a4ef7","mediumImageUrl":"//mojo.generalmills.com/api/public/content/XJXWLDuM-EOr6F5YNkYB_Q_webp_base.webp?v=c06de253\u0026t=3653fe2f5ecd4a47a5a51c97e429947c"},{"contentId":"40487892-6827-4ddd-88c0-8337e53d1c03","contentType":"Recipe","title":"Beer Cheese Brat Dip with Pretzel Bites","isFavorite":false,"linkUrl":"/recipes/beer-cheese-brat-dip-with-pretzel-bites/40487892-6827-4ddd-88c0-8337e53d1c03","numberOfRatings":"0","averageRating":"0","averageRatingStars":"0","smallImageUrl":"//mojo.generalmills.com/api/public/content/nB3pyqQoOEysUkvB1D8v1Q_webp_base.webp?v=98ed3697\u0026t=67e847e026fb43aa8d6e3f5ef39a4ef7","mediumImageUrl":"//mojo.generalmills.com/api/public/content/nB3pyqQoOEysUkvB1D8v1Q_webp_base.webp?v=98ed3697\u0026t=3653fe2f5ecd4a47a5a51c97e429947c"},{"contentId":"e12197ca-54de-46e1-8282-0d3e82addb5d","contentType":"Recipe","title":"Stuffed Pepperoni Pizza Braid","isFavorite":false,"linkUrl":"/recipes/stuffed-pepperoni-pizza-braid/e12197ca-54de-46e1-8282-0d3e82addb5d","numberOfRatings":"0","averageRating":"0","averageRatingStars":"0","smallImageUrl":"//mojo.generalmills.com/api/public/content/w6Jw3bt35kOrtBQrUXc00A_webp_base.webp?v=00cc7afb\u0026t=67e847e026fb43aa8d6e3f5ef39a4ef7","mediumImageUrl":"//mojo.generalmills.com/api/public/content/w6Jw3bt35kOrtBQrUXc00A_webp_base.webp?v=00cc7afb\u0026t=3653fe2f5ecd4a47a5a51c97e429947c"},{"contentId":"0c1a7849-32f3-4565-8df4-c125a9193805","contentType":"Recipe","title":"Pretzel Puffs","isFavorite":false,"linkUrl":"/recipes/pretzel-puffs/0c1a7849-32f3-4565-8df4-c125a9193805","numberOfRatings":"0","averageRating":"0","averageRatingStars":"0","smallImageUrl":"//mojo.generalmills.com/api/public/content/S4glsvGqRE6nzgTx4jYidg_webp_base.webp?v=0be4b23b\u0026t=67e847e026fb43aa8d6e3f5ef39a4ef7","mediumImageUrl":"//images-gmi-pmc.edge-generalmills.com/ad3349b5-9235-4b5e-b6ed-2671291531fb.jpg"},{"contentId":"6b99d141-0271-43d0-b3e2-54d369dd2a7c","contentType":"Recipe","title":"Mini Snowman Pizzas","isFavorite":false,"linkUrl":"/recipes/mini-snowman-pizzas/6b99d141-0271-43d0-b3e2-54d369dd2a7c","numberOfRatings":"0","averageRating":"0","averageRatingStars":"0","smallImageUrl":"//mojo.generalmills.com/api/public/content/LPWoxuZxhEiecnlDt-jhSQ_webp_base.webp?v=2b1285f2\u0026t=67e847e026fb43aa8d6e3f5ef39a4ef7","mediumImageUrl":"//mojo.generalmills.com/api/public/content/LPWoxuZxhEiecnlDt-jhSQ_webp_base.webp?v=2b1285f2\u0026t=3653fe2f5ecd4a47a5a51c97e429947c"}]}};
var moduleName = 'relatedContent';
var isVueModule = true;
GeneralMills.PandoSites.RegisterControlInstance(moduleName, configuration, componentMetadata, isVueModule)
});
})();
© 2025 ®/TM General Mills All Rights Reserved

